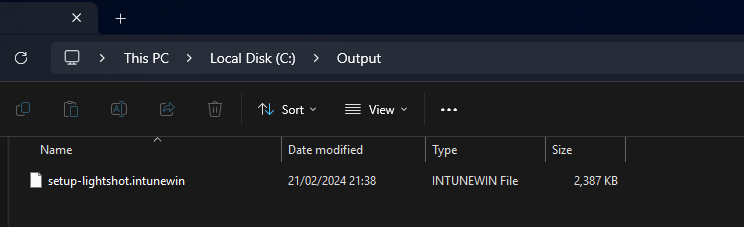
In your Output Folder, there should be a new file called setup-lightshot.intunewin. We need this file in Step 2
- This topic is empty.
- Post
-
- January 1, 2025 at 1:07 pm
Weekend WikiKeymasterDeploying Lightshot (a screenshot tool) via Microsoft Intune involves packaging the app, configuring deployment settings, and assigning it to users or devices. Here’s how to do it:
Steps to Deploy Lightshot with Microsoft Intune
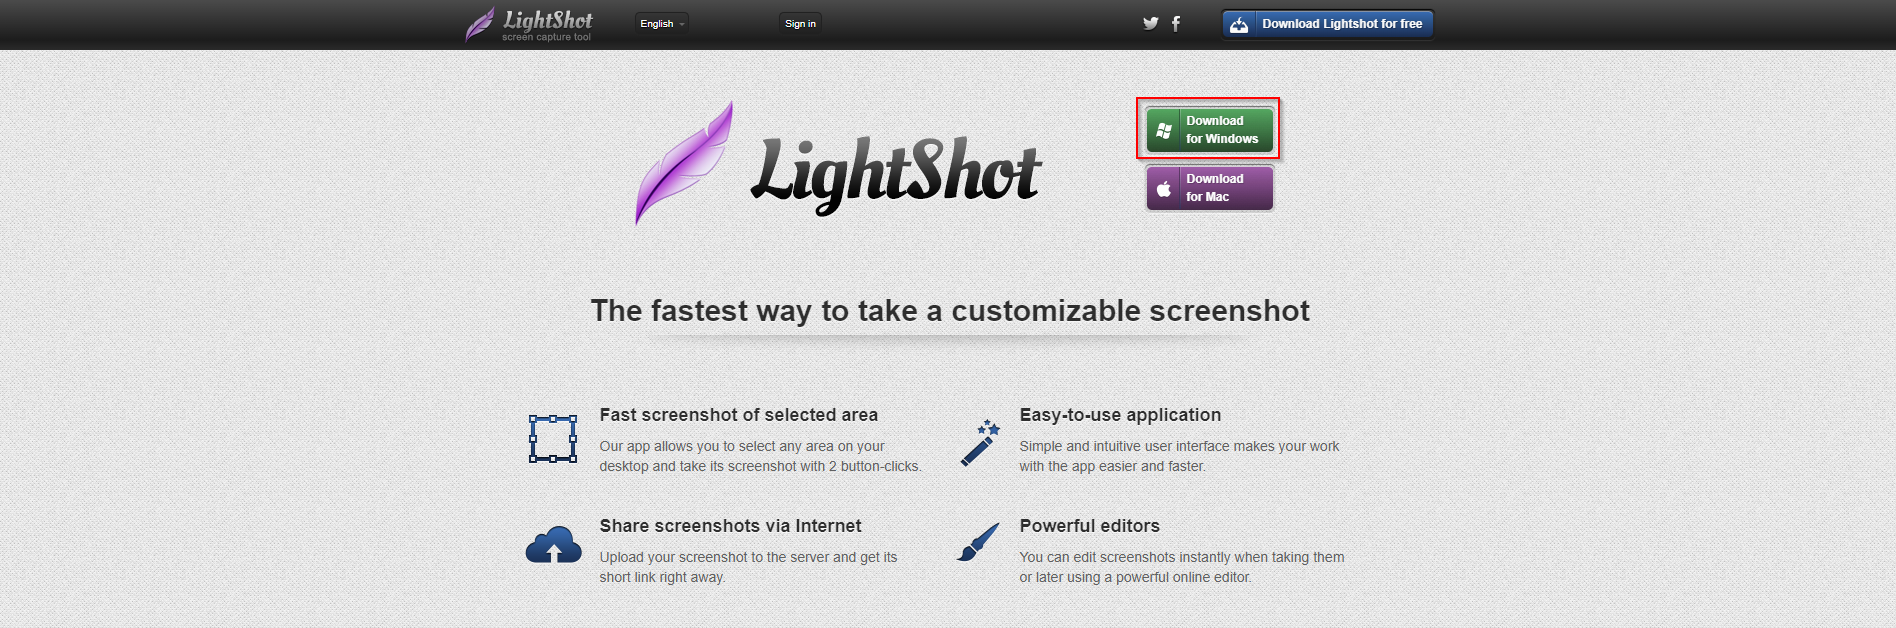
Step 1: Download the Lightshot Installer
- Visit the official Lightshot website and download the appropriate installer (
.exeor.msi) for Windows.- For Intune, MSI files are recommended as they simplify deployment and management.
Step 2: Prepare the Application
- If you downloaded a
.exefile, convert it to an.msifile using third-party tools like WinRAR, Advanced Installer, or PSADT (PowerShell App Deployment Toolkit).- Command-line example for EXE to MSI wrapping:
<lightshot-installer>.exe /s(This varies based on Lightshot’s support for silent installations.)
- Command-line example for EXE to MSI wrapping:
- Verify the application supports silent installation by testing deployment manually:
- Run the command:
LightshotInstaller.msi /quiet /norestart/quiet: Installs the app silently./norestart: Prevents system restarts during installation.
- Run the command:
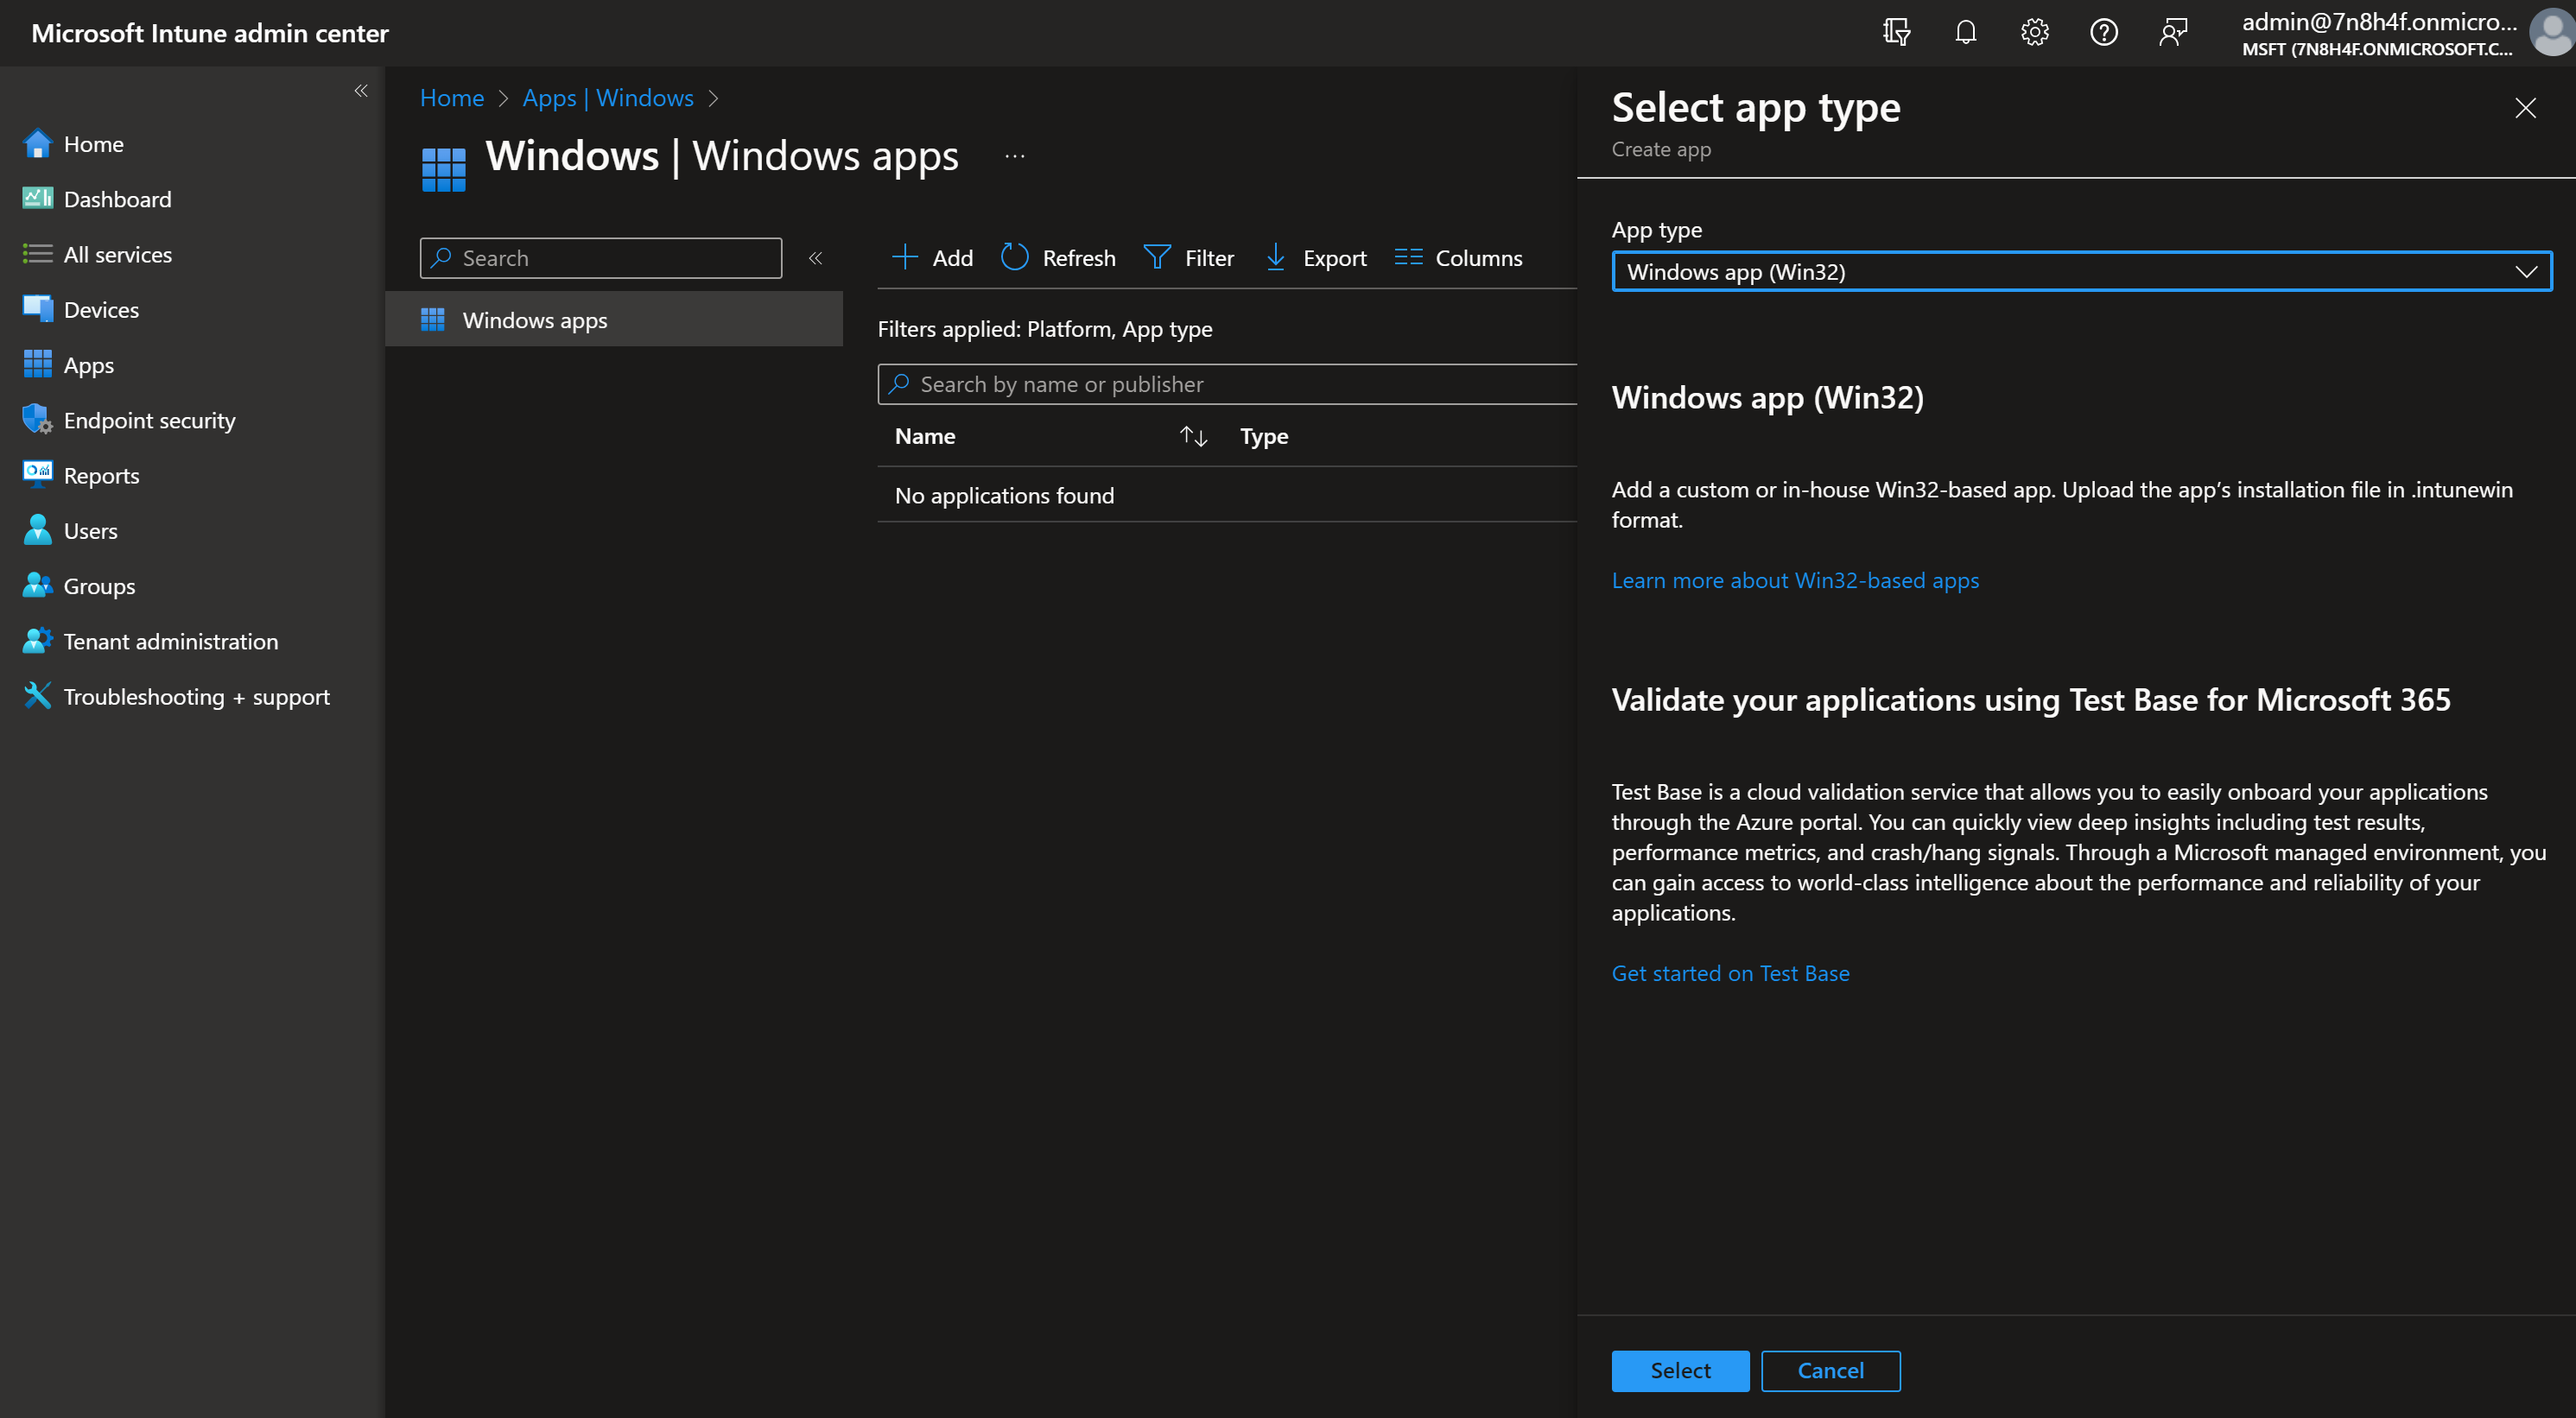
Step 3: Add the App to Microsoft Intune
- Log in to the Microsoft Intune Admin Center (link).
- Navigate to Apps > All Apps > + Add.
- Choose App type:
- Select Windows app (Win32) if using
.exe. - Select Line-of-business app if using
.msi. -

- Select Windows app (Win32) if using
- Upload the installer file:
- For
.msi, upload the Lightshot.msiinstaller file directly. - For
.exe, wrap the file into an Intune.intunewinpackage using the Microsoft Win32 Content Prep Tool:- Download the Win32 Content Prep Tool.
- Run the tool to create a
.intunewinfile:IntuneWinAppUtil.exe -c <source-folder> -s <lightshot-installer>.exe -o <output-folder> - Upload the
.intunewinfile in the Intune portal. -

- For
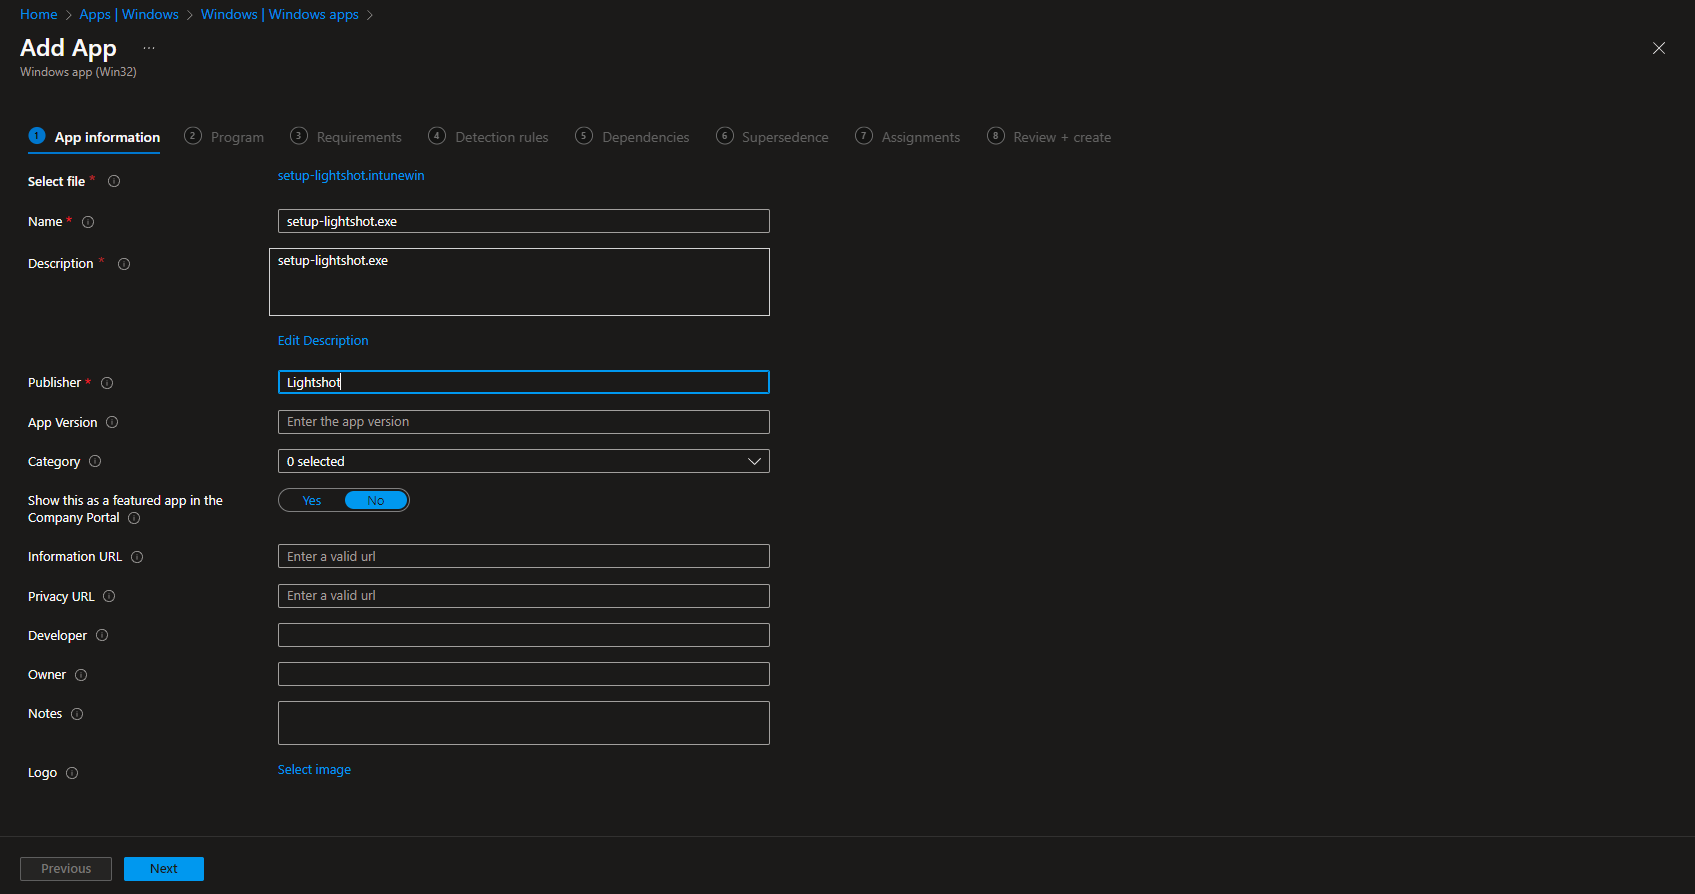
- Configure app information:
- Enter the app name (e.g., Lightshot), description, publisher, and version.
- Upload an app logo (optional).

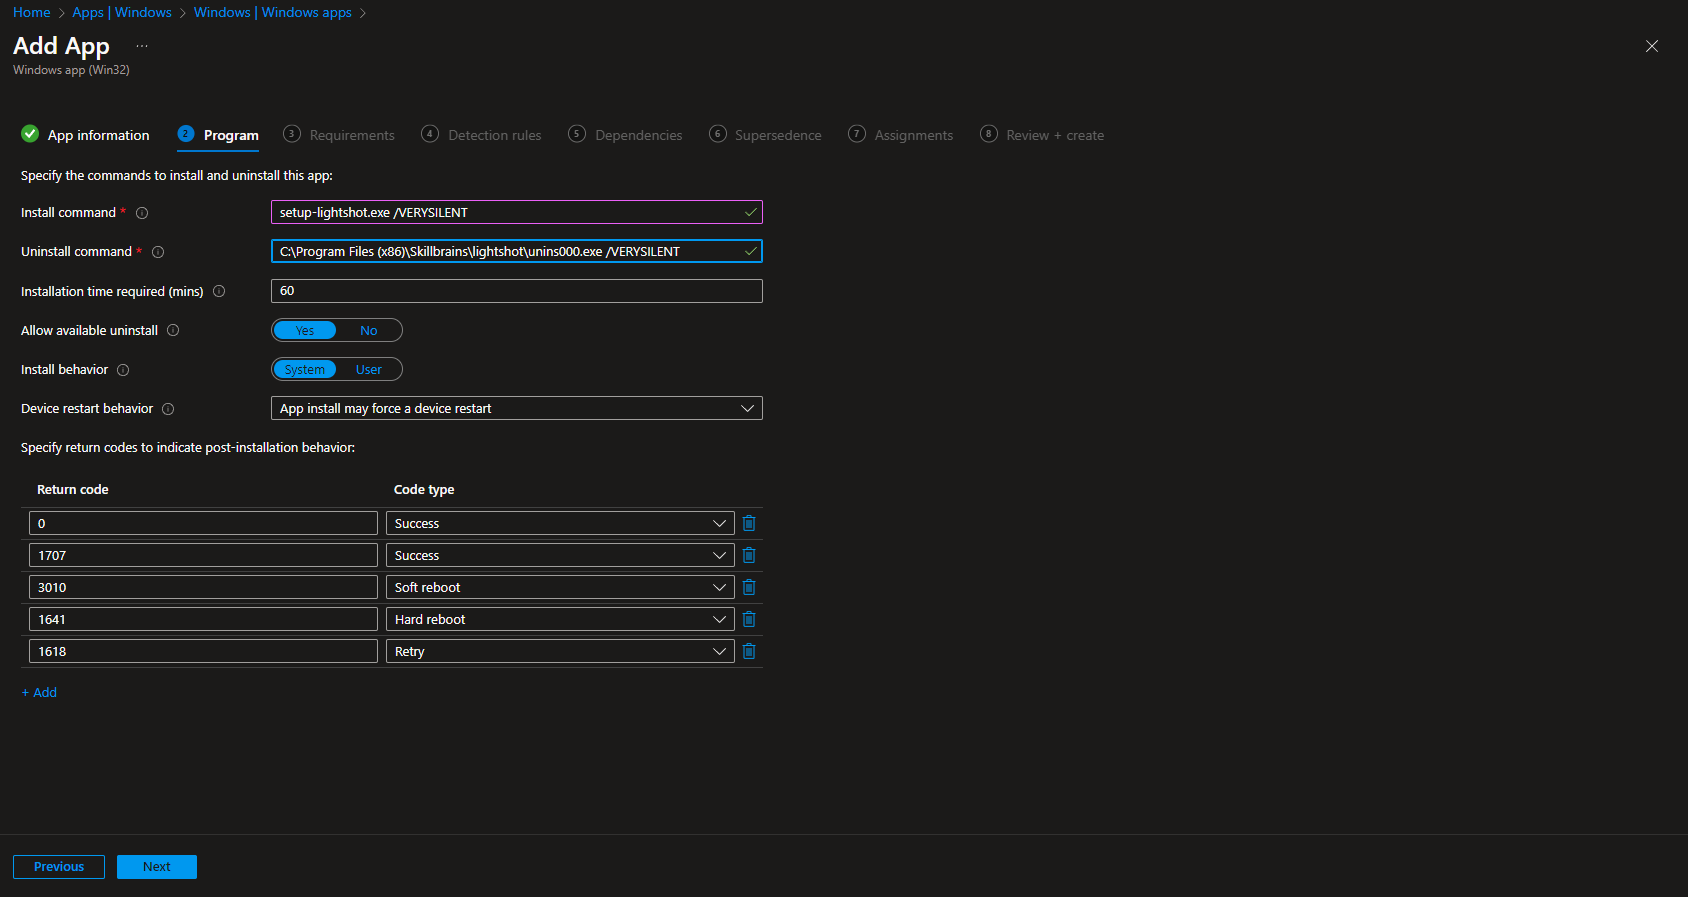
- Configure Program Settings:
- Install Command:
LightshotInstaller.msi /quiet /norestart - Uninstall Command:
msiexec /x {ProductCode} /quiet /norestart(Replace
{ProductCode}with the actual GUID for Lightshot’s MSI package.)
- Install Command:
Step 4: Assign the App
- Assign the app to Users or Devices:
- Required: Automatically installs the app on targeted devices.
- Available for enrolled devices: Allows users to install the app from the Company Portal.
- Choose deployment groups:
- Use Azure AD groups to target specific users or devices.
Step 5: Monitor Deployment
- After assigning the app, monitor the deployment status:
- Go to Apps > Monitor > App Install Status.
- Check for successful installations or troubleshoot errors.
Notes
- Silent Install Testing: Always test the silent installation (
/quiet) command locally on a test machine before deploying. - Updates: Configure Lightshot’s auto-update feature if available. Alternatively, redeploy newer versions via Intune when required.
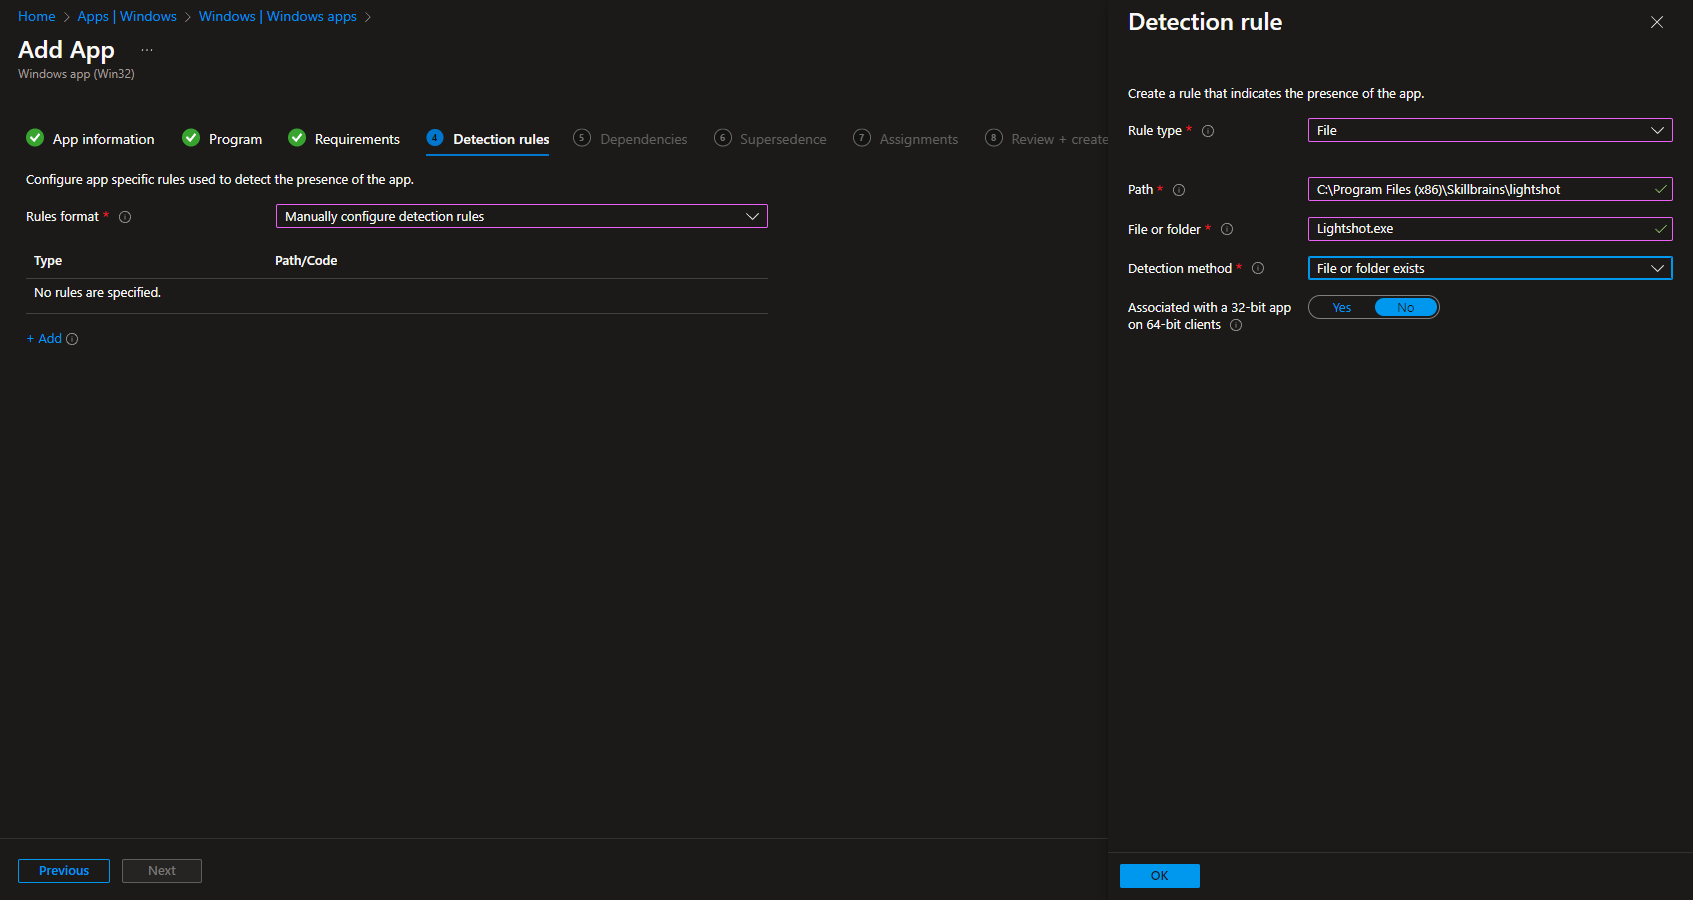
- Uninstall Option: Ensure an uninstall command is defined in Intune for easy removal if needed.
Let me know if you’d like help preparing
.intunewinfiles or troubleshooting issues during deployment!
- You must be logged in to reply to this topic.